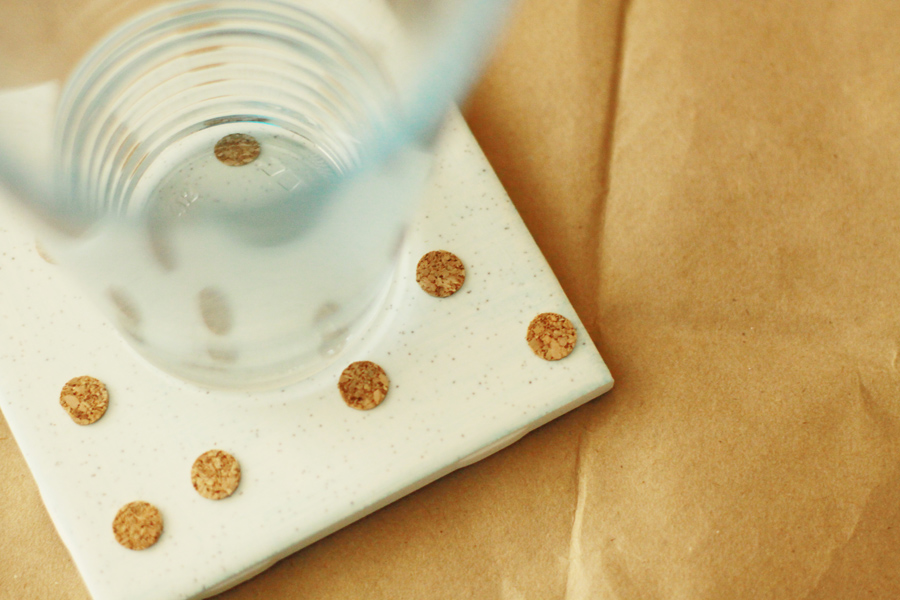
One of the great policies that the company I work for has adopted is the use of plastic tumblers instead of disposable containers. There’s fancy water in the soda machine and plenty of ice, but there’s still one little problem: water rings.
Despite my best efforts to reduce paper usage, sometimes you just need a report printed out. You can imagine the combination of important printed reports and leftover water condensation: work disaster. I noticed a few weeks ago that some people used a napkin underneath to absorb the excess water, but that seemed like a waste of a perfectly good napkin. Late last month, I noticed a few coworkers had brought in coasters. COASTERS. You’d think I just witnessed someone invent a cure for acne!
I whipped up a couple of cute coasters for the office- they’re decorated with cork and perfect for catching report-destroying water. Also very cute as a housewarming or hostess gift!

DIY Cork Decorated Coasters
- ceramic or glass tiles
- adhesive cork liner paper
- craft punches
- felt
- foam brush and glass paint, if you’d like to add a little color
If you’ve elected to color your tiles, go ahead and start with a wash of your glass paint right onto the top of the coaster. Note that each brand of glass paint will specify on the back whether they can only be used on glass or can also be used on ceramic- just pay attention so that you don’t use the wrong paint for your tile type. I like going with a translucent wash for a watercolor-type look. (Wait for the paint to dry before moving to the cork decorating phase. This might take a while, depending on your glass paint- just follow the manufacturer’s instructions.)
Use your craft punches to punch out your desired shapes.

Once you’ve prepared all your shapes, peel off the backs and arrange them on the surface of your tile.
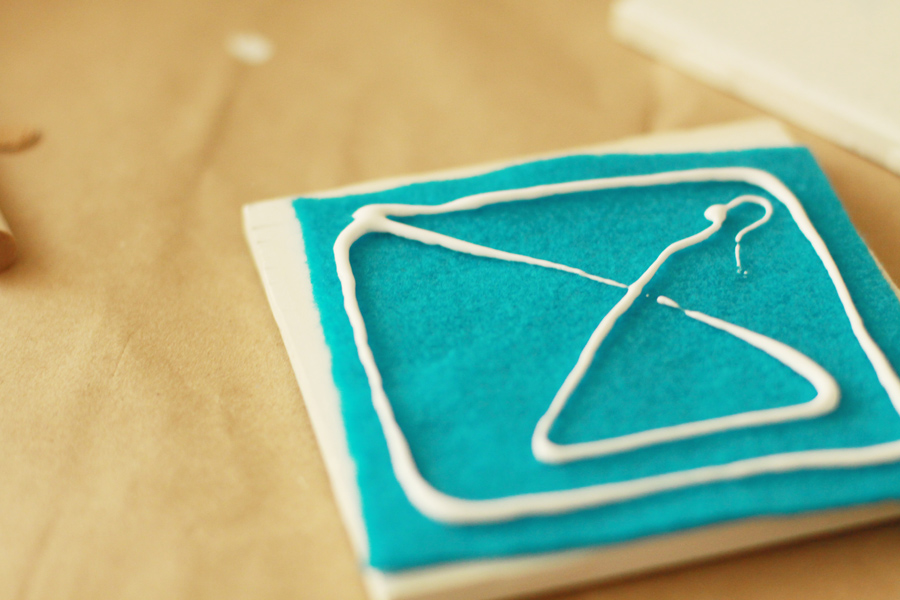
Cut a piece of felt fabric slightly smaller than the size of your tile. Using a glue gun or craft glue, attach the felt to the back side of the tile.
Once the felt is dry, your coasters are ready to go!
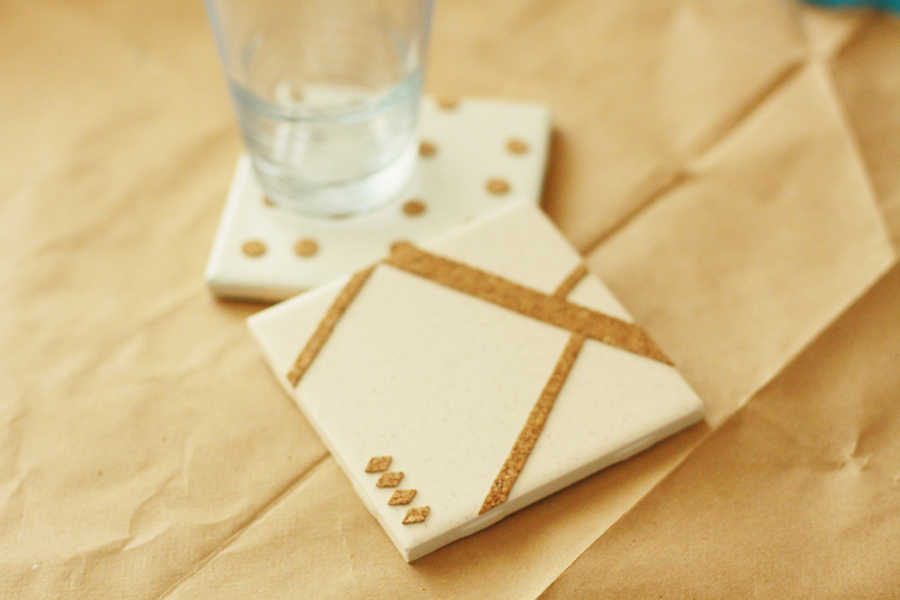
Apart from craft punches, you can obviously use scissors and cut out any shapes you want. Exact-o knives tend to pull on the cork, but if you’re careful you can even use stencils to prepare a shape for your tile top.
Water ring crisis: averted.