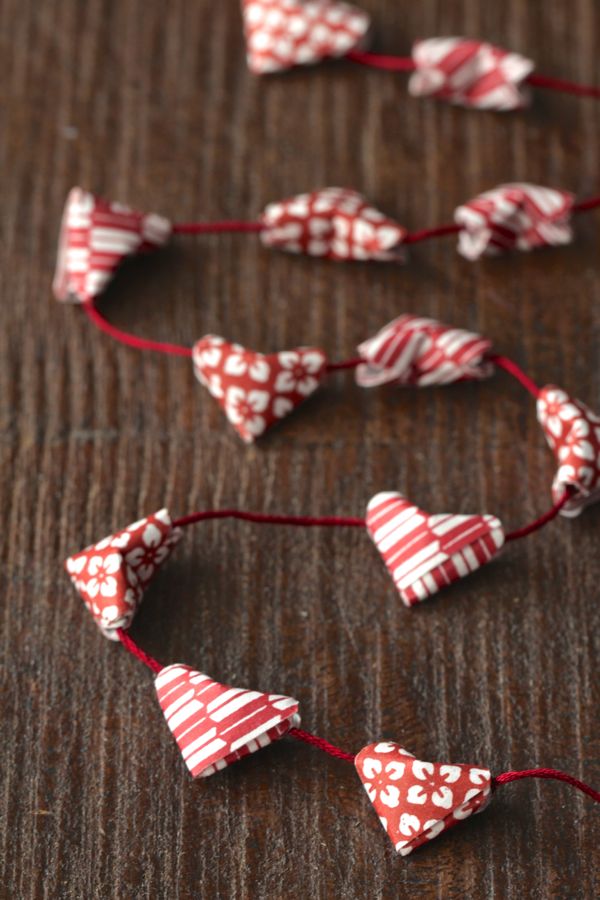
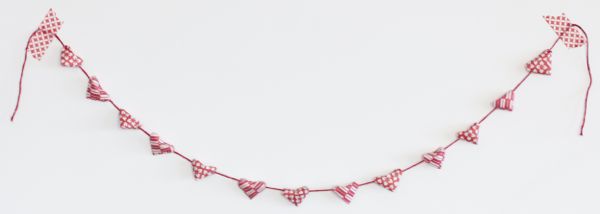
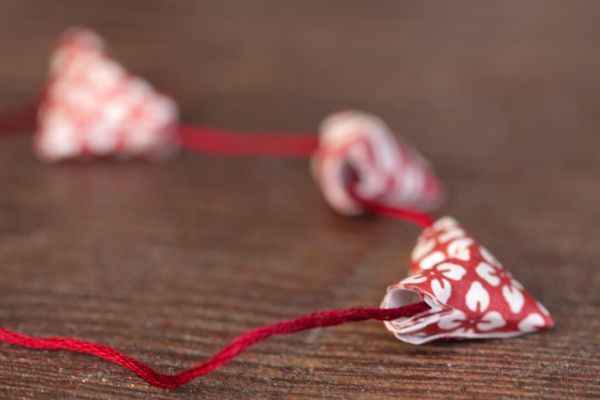
 The title lies. This is actually kirigami, but I’m not sure if that would have grabbed your attention! If origami is the art of folding paper, kirigami is the art of folding AND cutting paper. There are just two little snips involved in making these adorable little puffy hearts, so it’s not a very elaborate project. And since our origami star garland was so popular over the holidays, we thought you guys might like this origami heart garland just as much.
The hearts took about 2 minutes each to make, so pop on your favorite sitcom and start folding. By the time your show is over, you’ll have enough hearts for a short garland. Enlist in some help from your significant other, kids or roommates and you’ll be able to string together something more elaborate. (Seriously, they’re so easy! You don’t have to be crafty to make them.)
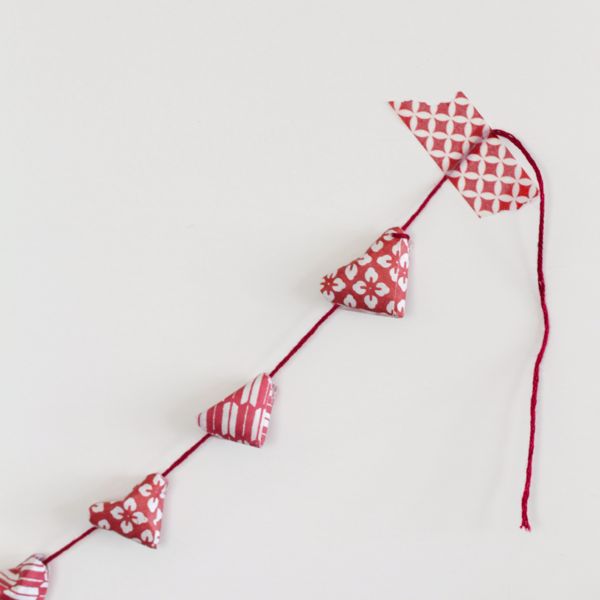
While the timing is perfect for Valentine’s Day, I also love the idea of finding ways to use these for a wedding. Hang them from the backs of chairs. String them on the bar. Drape them over a photo or place card board. Make just the hearts (and don’t string them) and use them in centerpieces.
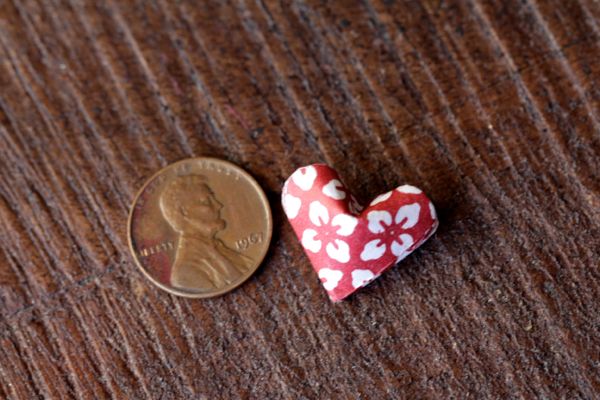
You can experiment with the size and length of your paper to see what works best for you. I used origami paper, which is about 7 inches long. I cut them into 1 inch wide strips, and my final hearts are about 1×1 inch. You may not want to use paper that’s too thick, or it will be more difficult to trim it and pinch the top in.

What you’ll need:
Paper in your choice of colors, cut into about 7×1 inch strips.
Scissors
Embroidery floss and a thick needle
What to do:
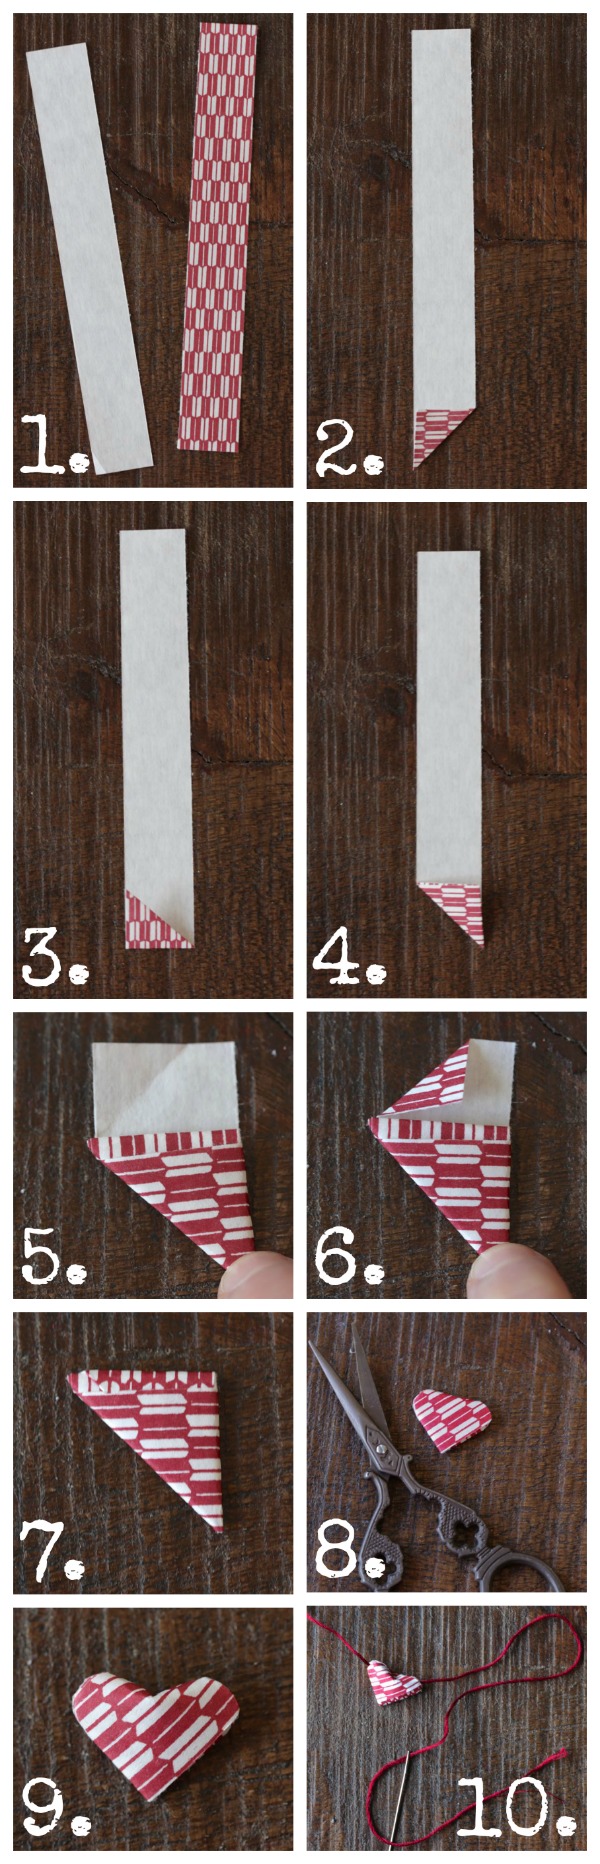
1. Place a strip of paper on a flat surface with the back side up.
2. Fold one of the bottom corners up to the opposite side of the paper to make a triangle with the pattern facing up. The bottom edge of the paper will have a point now.
3. Fold this patterned section up to create a flat bottom on the strip of paper.
4. Remember in grade school when you used to make paper footballs to flick through a “goalpost” made out of your friends hands? You’re just making one of those. Just keep folding.
5. Are you still folding? Stop when you can no longer make a complete fold.
6. You want to tuck the lose end back into the triangle shape, but it won’t fit unless you fold down the corner that corresponds to the slanted side of the triangle (as opposed to the straight side. The hypotenuse, if we’re being technical!). Fold and crease that side.
7. Tuck the flap it back into the triangle.
8. So now you have a triangle with a 90 degree angle and 2 smaller, 45 degree angles. Use a pair of sharp scissors to round off the points at the 45 degree angles.
9. Use a fingernail to create a dent between the rounded sides, opposite the 90 degree angle. Now you should have a 3D heart!
10. Thread the needle with the embroidery floss. String the hearts through the sides of the rounded edges. Since you cut those points off, there’s now a natural channel to thread the needle through. (See photo below.)
11. Repeat for as many hearts as you’d like to hang on your garland!
One Year Ago: DIY Ombre Wine Cork Trivet

So crafty! This looks super cute. 🙂
Thanks, Ashley!
OMG THESE ARE FREAKING CUTIES! By the way, completely weird I know – but this is how I fold up my empty shopping (plastic) bags from the grocery store! Minus step 8-10! I soooo know i could do this! Omg.
Just wondering where I round off the points since the triangle is a bit like an isosceles triangle and not equilateral. (Totally had to google those names, I forgot the names of the triangles hahahahahhaha).
Ah! I know what you mean about folding the plastic bags, it’s totally the same!
The triangle will have one side that’s significantly longer than the others, and that’s the side that becomes the top of your heart. So you want to round off the two corners adjacent to that longer side. I hope that helps! Let me know if it’s still not clear and I’ll try with a photo 🙂
These are super duper cute. I can see myself using this as a topper on a cake strung between 2 skewers. Love it!
oh my gosh, SUCH A CUTE IDEA! And perfect for a wedding!! Thanks, Lynn 🙂
You’re so creative! This is such a cute idea for Valentine’s Day. Also – I had no idea that origami + cuts had its own name!
Oh my gosh! These are so tiny and cute! I’m in love!
thanks, kelly! they make me smile 🙂
thank you.
Hi!
How do you get the hearts to stay in place on the string?
Great tutorial. Thanks!!!!
Hi Renata, they sit pretty tightly on the thread, so i can just position them and they stay in place. But if that doesn’t work for you, you can tie a knot on either side of the star. Hope that helps! Thanks for the comment 🙂