Just after Christmas, I was walking around Michael’s: texting Alyssa, browsing the shelves, soaking up inspiration, trying not to spend millions and millions of dollars. You know- the usual Michael’s trip. (It’s a lot like the Target trip but with less toilet paper/sports bras and more glitter.)
It’s been years since I worked with clay and even though I like the medium, I tend to shy away from it. I have some sort of mental block about clay being wonderful for small and decorative (if somewhat nonfunctional) items, but I ALREADY have mounds of that kind of thing. Still, I was lingering in the aisle, gaping at the gorgeous colors and varieties and I knew I had to have some. (Look, I know I just said that thing about colors and it’s TRUE, I was IMPRESSED by the colors, but… I bought black.)
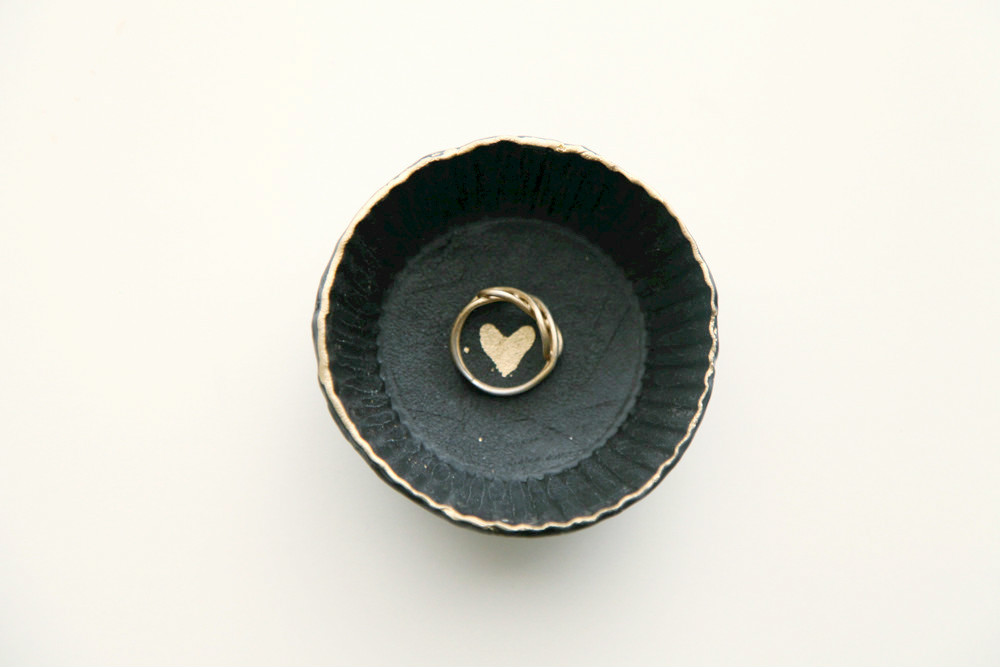
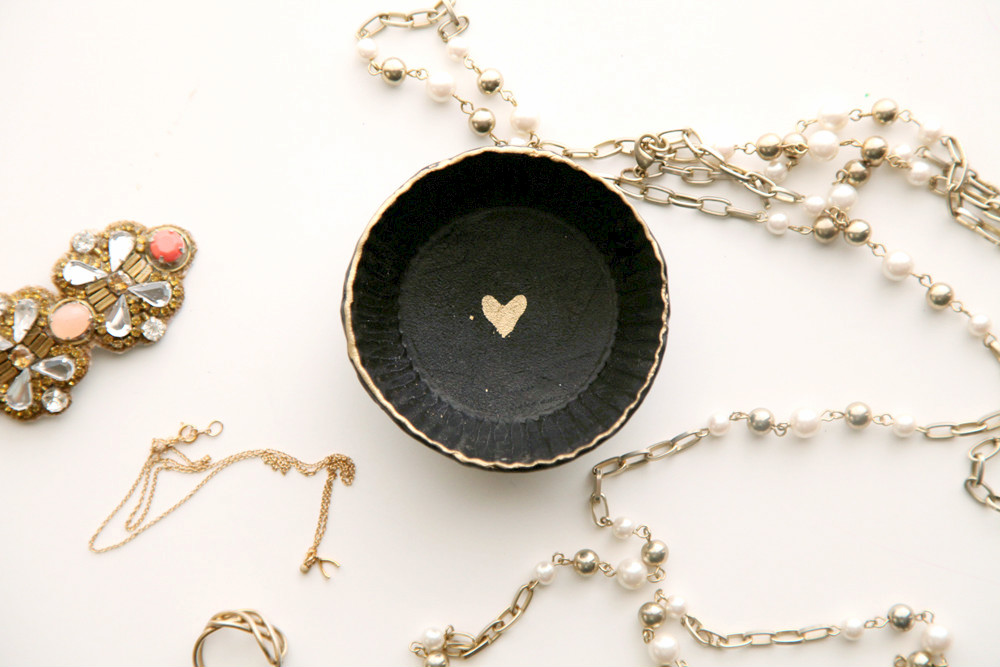
A few weeks later, I had finally dreamed up a small item that would be super cute AND functional: a small ring bowl, spiced up with metallic trim and perfect for setting by your sink or bedside table for all your ring/jewelry holding needs.
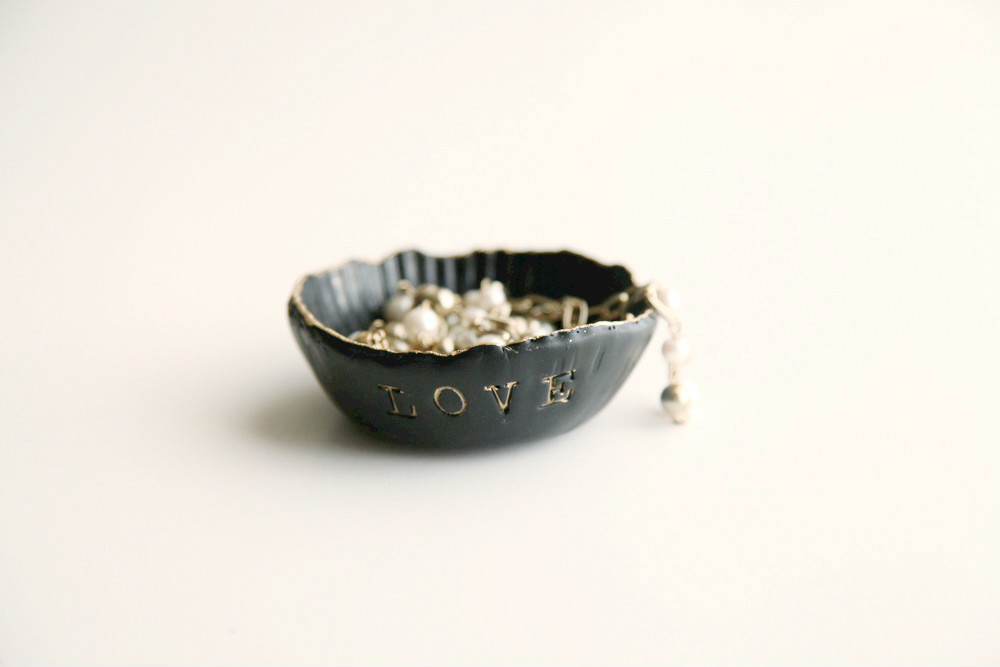
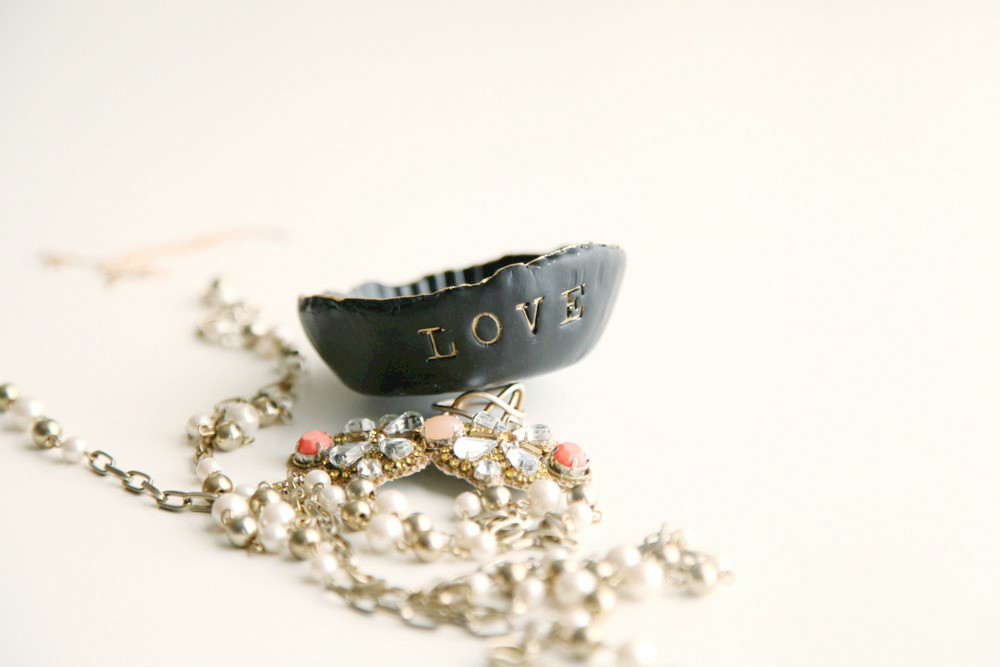
The end result is perfectly dreamy and I can’t get enough of it. I love the idea that there are so many ways to go with the lettering: you might try a date, a name, a quote. It is perfect to make for yourself and a GREAT gift. (Quick, someone get married so I can give you this at your bridal shower!)
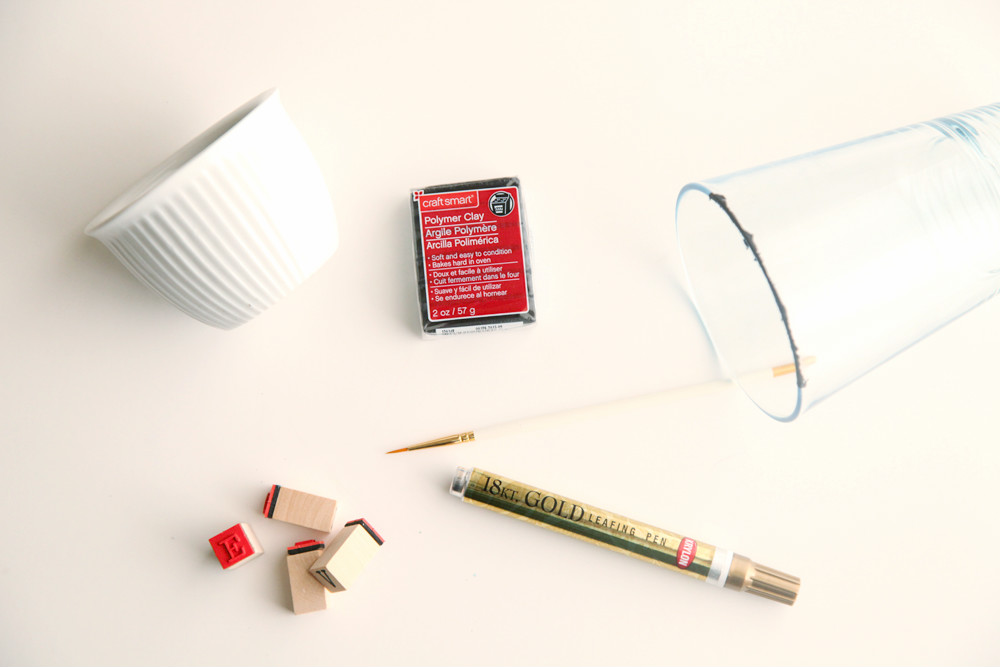
- 2 oz pack of polymer clay
- gold leafing pen
- pint glass
- ramekin or small bowl
- thin paintbrush
- letter/number stamps
- Knead the clay briefly between your hands until it is softer and a bit more pliable. Using a rolling pin or very sturdy glass, roll the clay out to about 1/4 inch thick.
- Use the pint glass rim to cut a circle out of the clay. Soften the edges of your circle with your fingers.
- Lay the clay circle over the bottom of your ramekin to create a bowl shape. Press the clay firmly up the sides.
- Using your stamps, press your message into the side of your clay.
- Follow the instructions printed on your particular brand of clay to bake your new clay bowl shape. I kept the bowl on the ramekin during baking, but this can be tricky if you are using a color since the ramekin may get too hot and scorch your bowl.
- Remove your bowl/ramekin from the oven and set aside to completely cool. Once cool, the bowl will pop off the ramekin with a firm pry.
- Using the gold leaf pen, draw a gold heart onto the inside of your bowl.
- To color the inside of your stamped letters/numbers with metallic paint, run your small paintbrush along the tip of the metallic pen. Paint in the shapes using the paint.
- Once you've added all the color you'd like to the outside, run your gold leaf pen across the rim of your ring bowl and leave to dry for about 20 minutes.
A couple more tips:
I found the gold leafing pen at the hardware store, and it is one of several types of gold color application versions I like. If you have Liquid Leaf, feel free to use that! You can apply it with the same small paintbrush. Metallic Sharpies would work also, but the color will not be as intense. I also found Sharpies did not wear as well on my brand of clay.
I used a ramekin with a ribbed design because I wanted to incorporate that into my bowl. If you prefer a smooth look, simply use a smooth bowl. Of course, if you want MORE design- use a more intricate bowl (and also tell me where you found it!)
This is so lovely! Thanks for sharing 🙂
https://www.cafecraftea.blogspot.com