Shrink plastic. A.k.a. Shrinky Dinks. A.k.a. puraban (in Japanese). Do you know about this stuff? I was a really crafty kid, and I somehow missed this miracle product. I understand that it was big in the 80’s, and I guess I was probably a little to young to know about it. It seems to be making a comeback though! I was at a Japanese craft store a few weeks ago with a friend who explained the concept to me, and I almost died of excitement (it’s huge here in Japan). You buy clear sheets of thin plastic and draw your own designs on them with permanent marker. Cut out the shape and bake the plastic in an oven for about 45 seconds. The plastic shrinks to create a much smaller, much thicker, and sturdier piece of plastic with your design on it (in miniature, with more concentrate color). They also sell the plastic sheets in different colors and patterns that you can cut shapes out of.
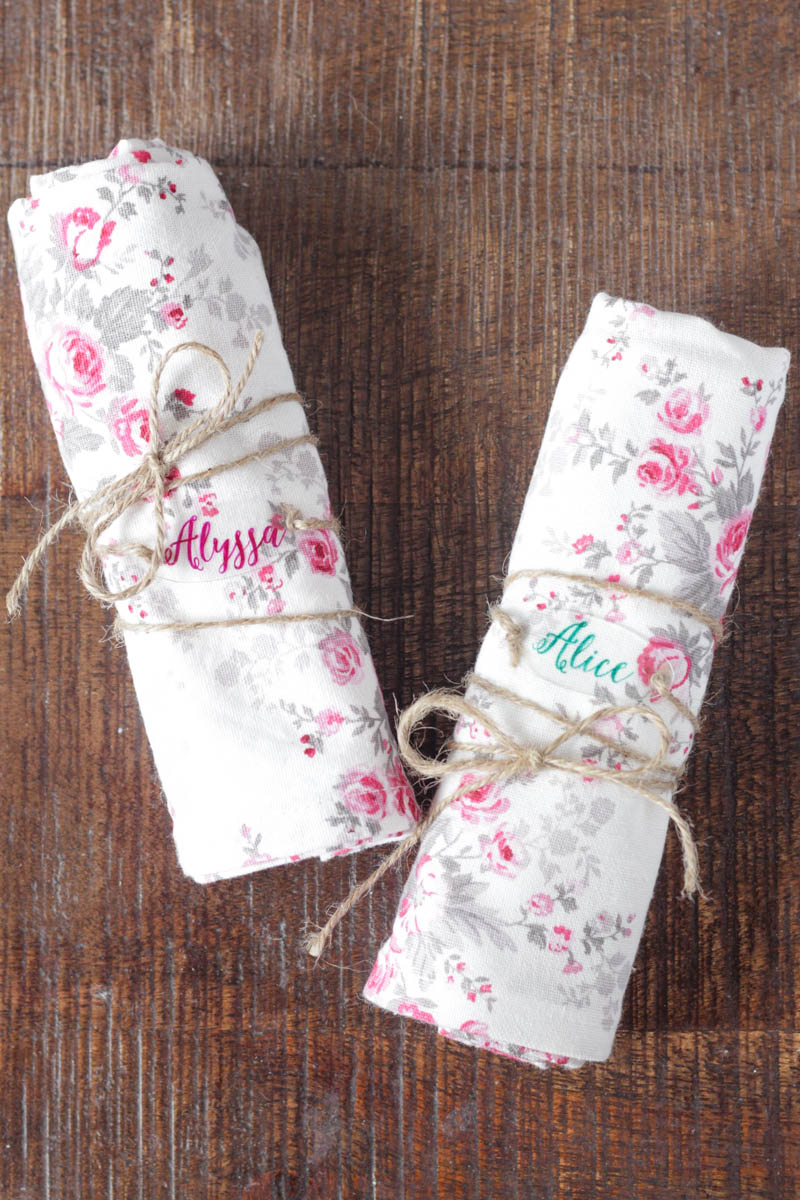
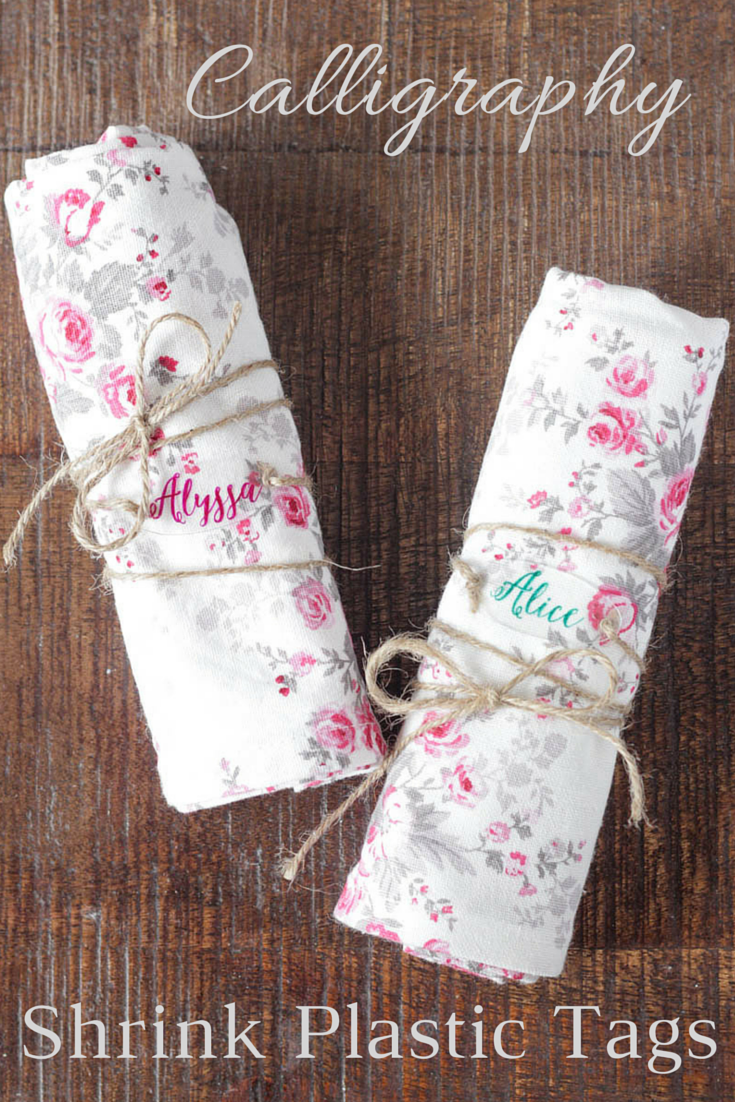
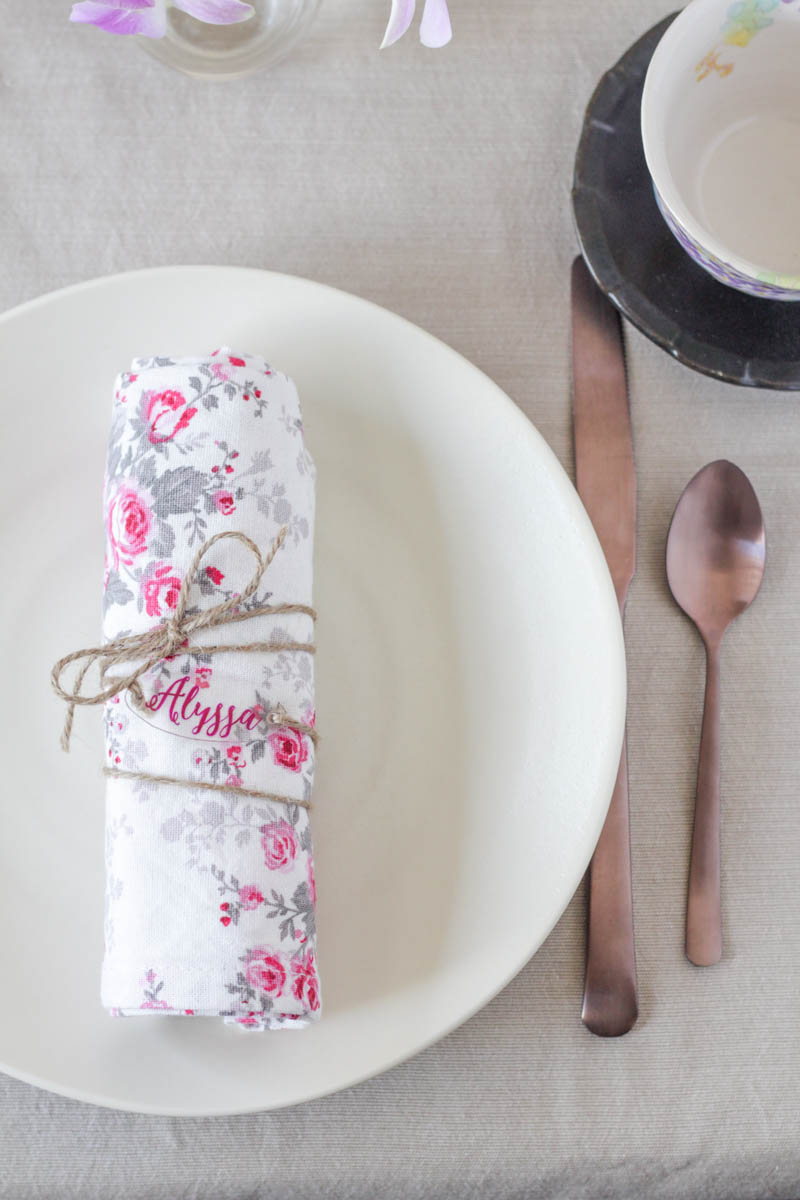
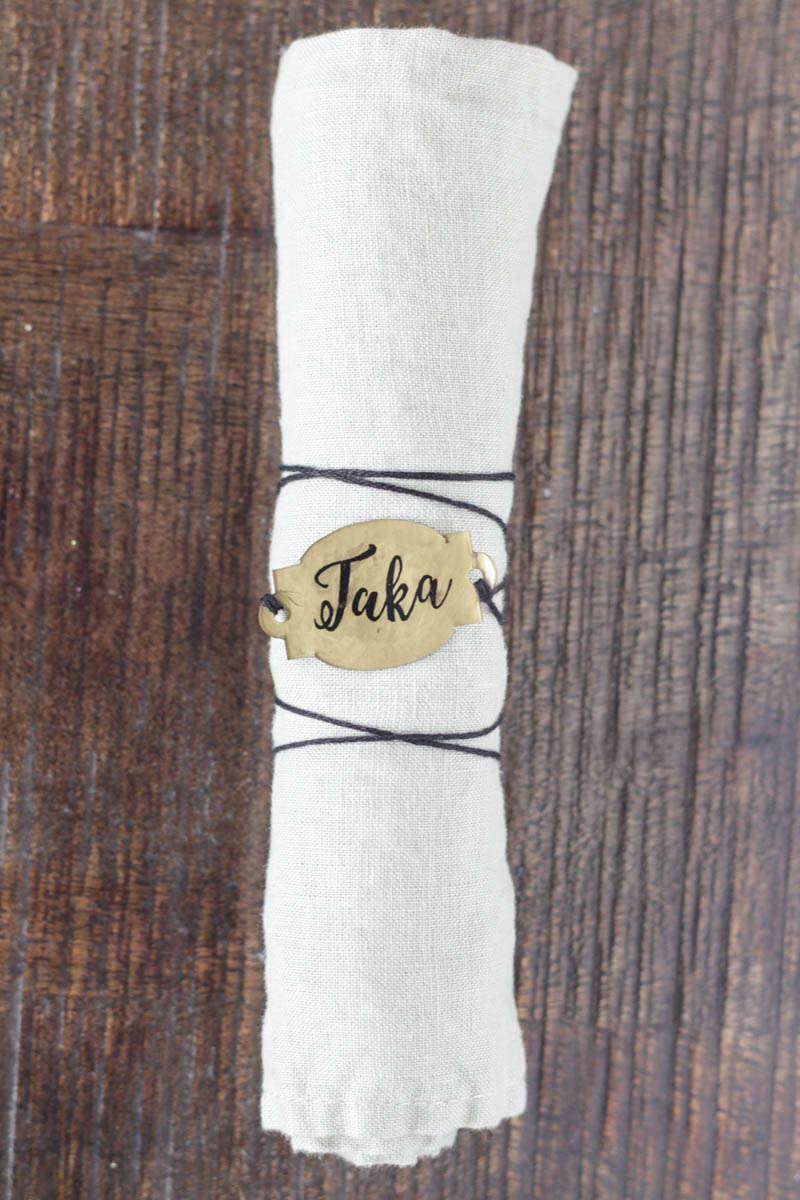
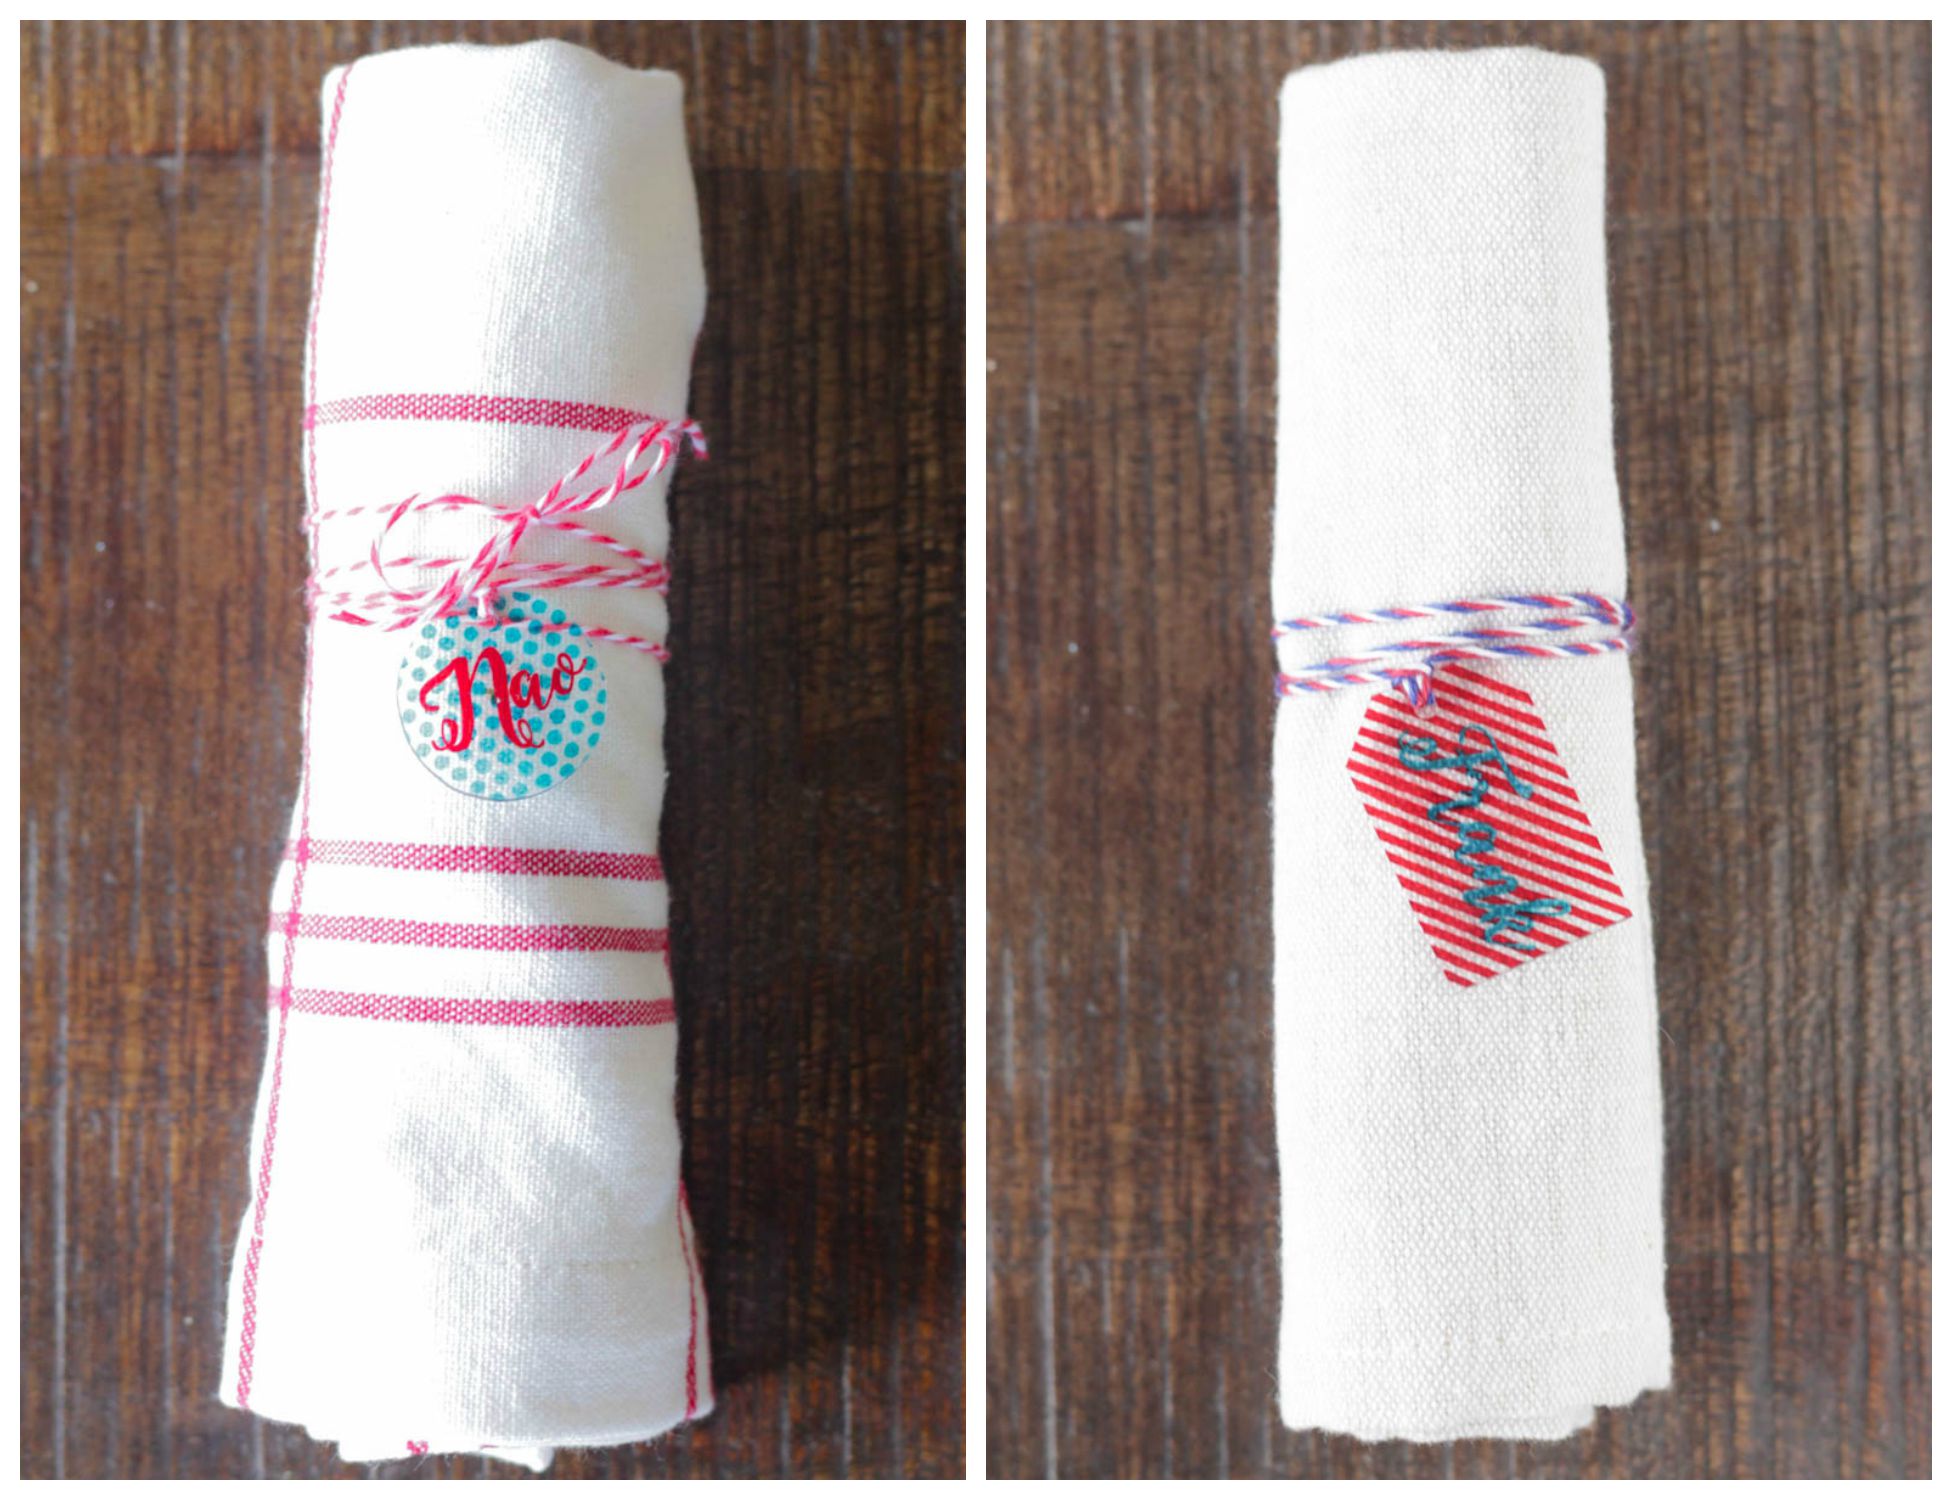
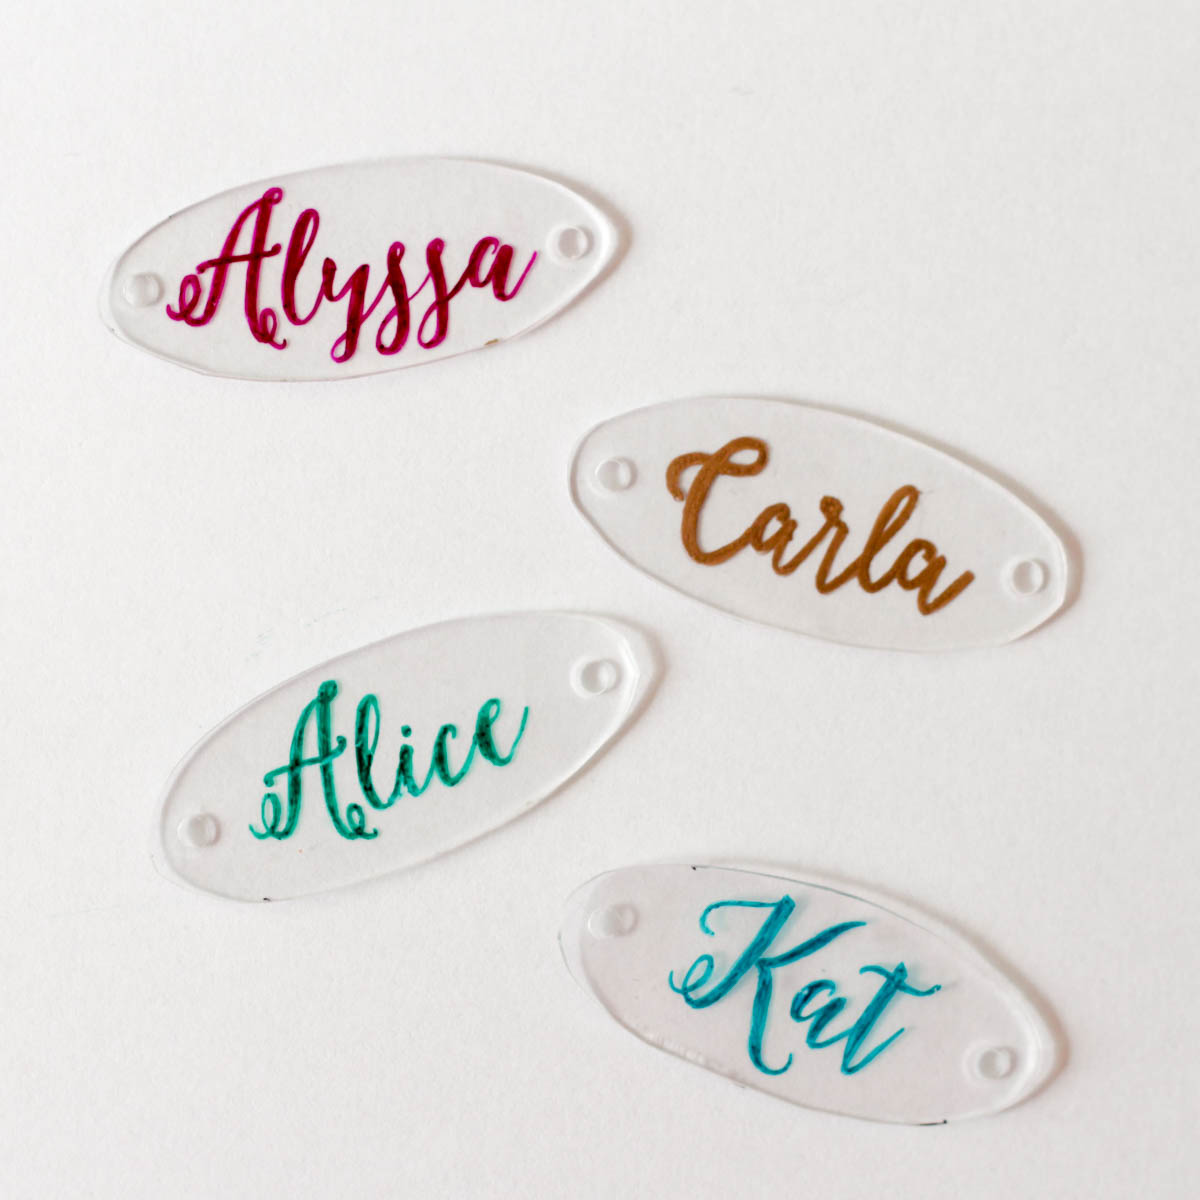
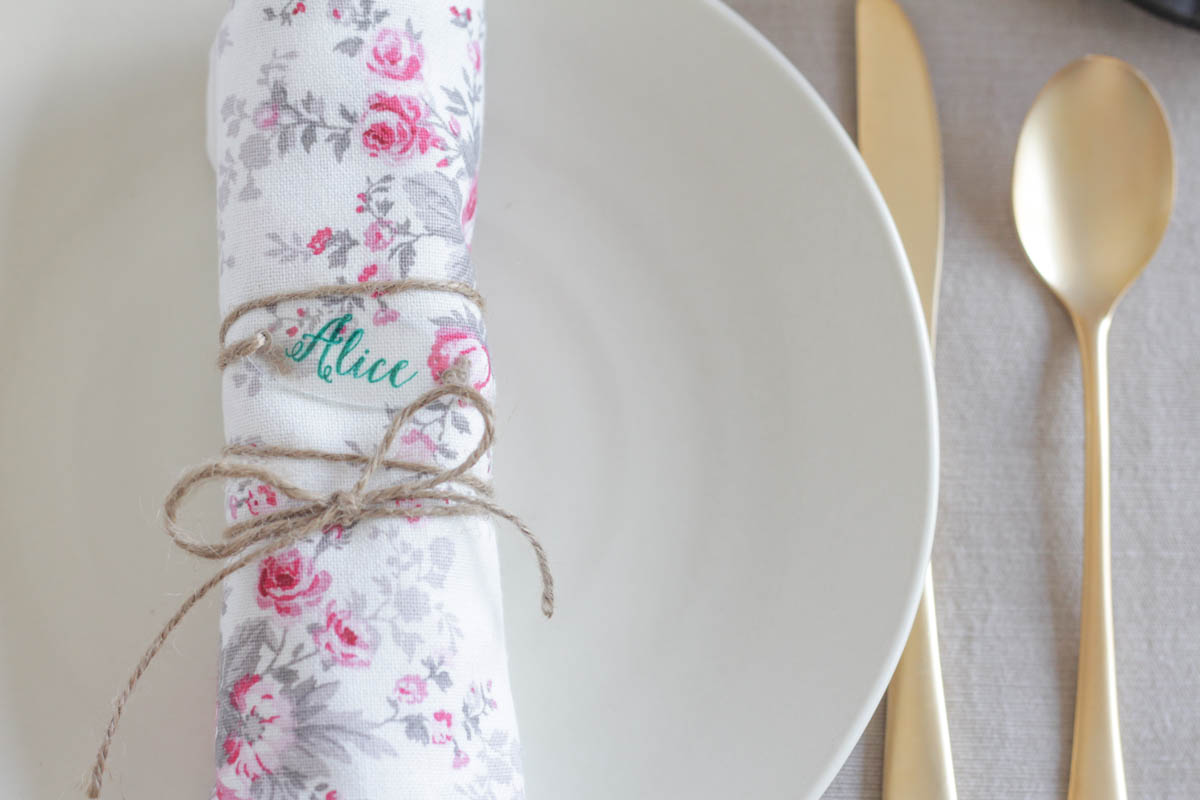
All I could think of were the possibilities. Jewelry! Magnets! Hair clips! Pins! Where to start? I actually didn’t even try to make anything for about 2 weeks because I couldn’t decide where to begin. I’ve been hooked on calligraphy, so I thought it would be fun to write out names on different shapes to create shrink plastic tags. I loved them so much that I turned them into tied napkin rings for my next dinner party, but they could also be gift tags, drink markers, or even jewelry. Now I’m addicted, and I’ve created a Pinterest board full of inspiration.

You draw the design on one side of the plastic as a mirror image of what you want it to look like, because you view the design through the reverse side of the plastic. This can be a little tricky with lettering, because you need to write everything backward. I made my calligraphy name template by using my favorite font on my computer to spell out the names. I have some design software that allows me to flip the text (I actually used Silhouette Studio!), but you can also use Word to write the fonts, take a screen shot, then use a photo editor to just flip the design. You can draw the shape of the tag in a design program (or Word) as well, or you can hand-draw them on the print out.
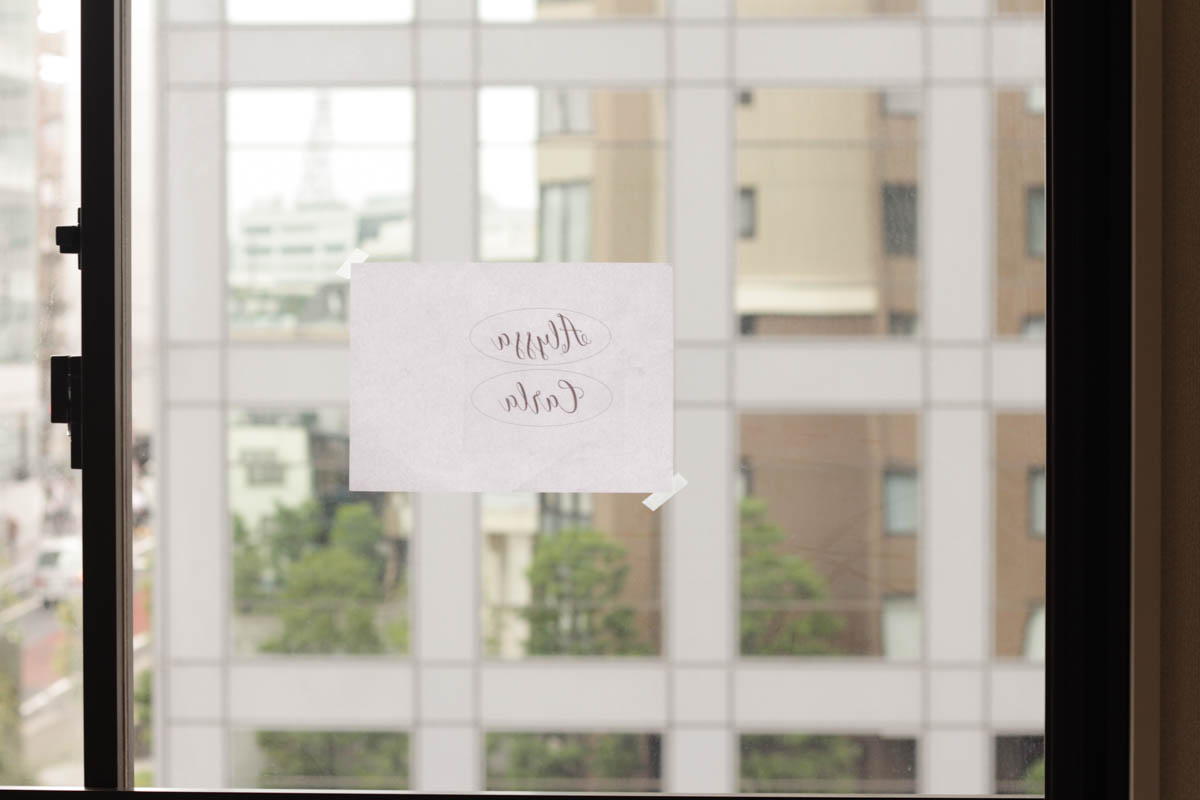
If you don’t have a way to reverse the text, you can print out the design normally then tape it to a window (printed side facing out). This creates a mirror image for you, which you can trace on the reverse of the paper or just tape the plastic on the paper and trace it while on the window (which might be a little tricky). Here’s what it would look like:
If you’re super-talented, you can hand-draw the names instead of using a computer font. From there you can scan the image and flip it in a photo editing program and then print it out again, or you can use the window trick above.
A few tips:
Make sure the plastic is clean before you bake it. Any fingerprints or smudges WILL show up in the final product.
The bigger your shape is, the better the chances are that the end result might be slightly warped or misshapen. Keep the original small (no bigger than 4 inches in any direction).
My plastic shrank to about 45% of the original size, but you can measure yours with a test. Cut a 1-inch square of plastic and bake it according to the packages directions. Measure the shrunken plastic to determine how much yours will shrink, and size your designs accordingly.
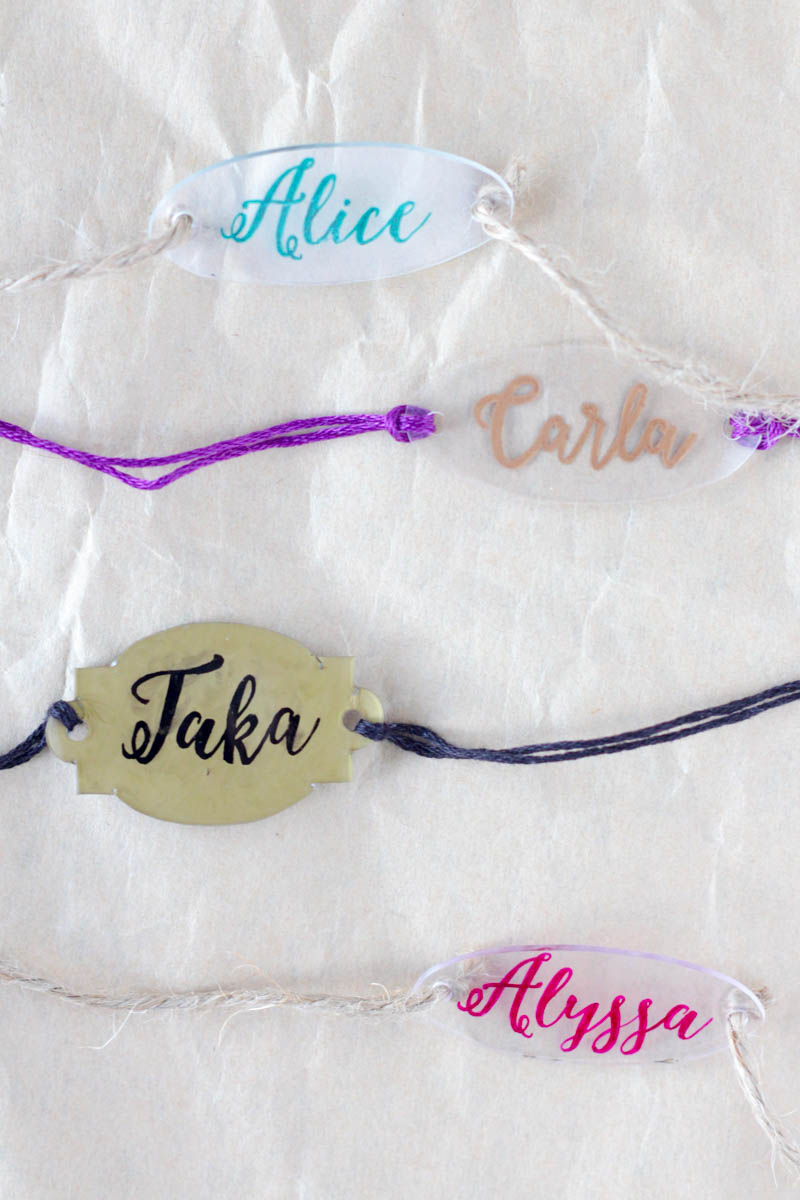
Color get darker because they become more concentrated. A navy blue will look black, but a cobalt blue will turn into navy, etc.
You can paint the back of the final project if you want the design to stand against an opaque color. I used a metallic paint marker with fantastic results (on the “Taka” tag above). You may want to test it first though, to make sure it doesn’t smear the baked design and that it doesn’t streak on the plastic. (You can also buy dye specifically to color larger areas of shrink plastic, which you apply before you bake the design.)
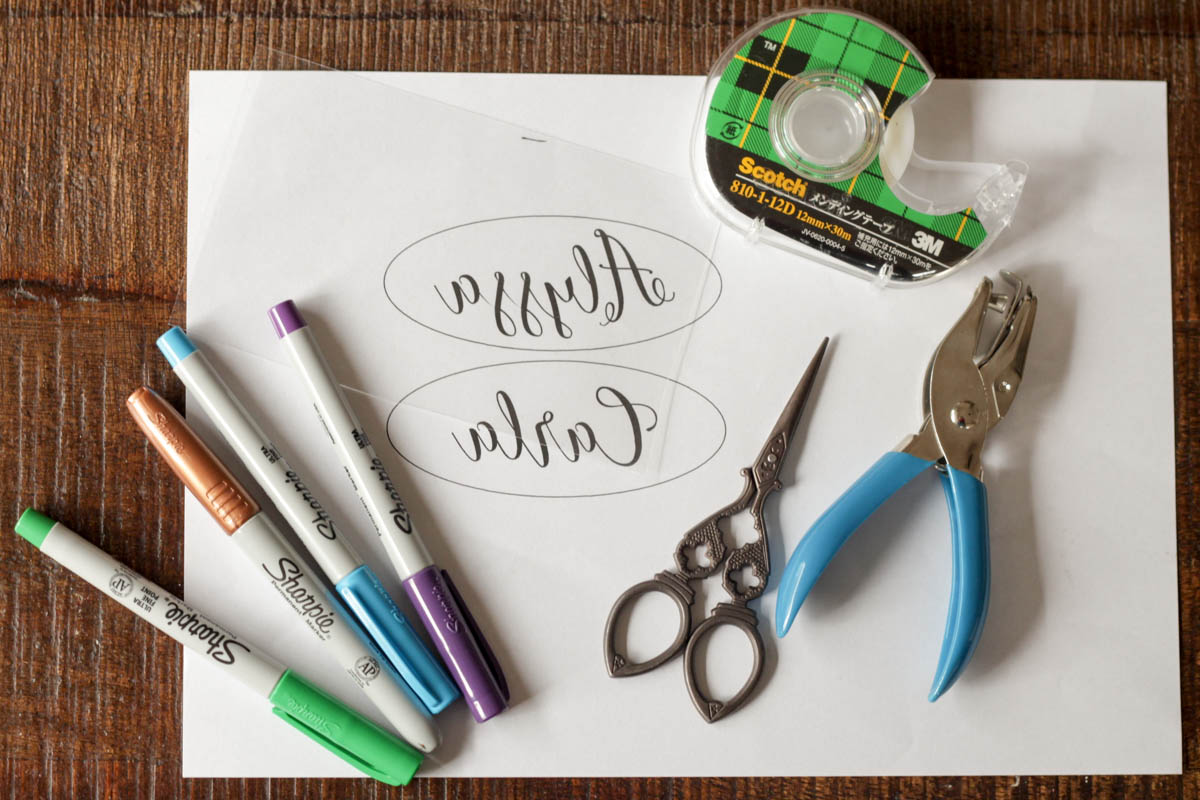
What you’ll need:
Shrink plastic sheets
Names in calligraphy font, printed out in reverse (see above for instructions on how to do this)
Tape
Permanent markers
Scissors
Hole punch
Baking sheet
Tinfoil
Oven
String/twine/yarn/thread
What to do:
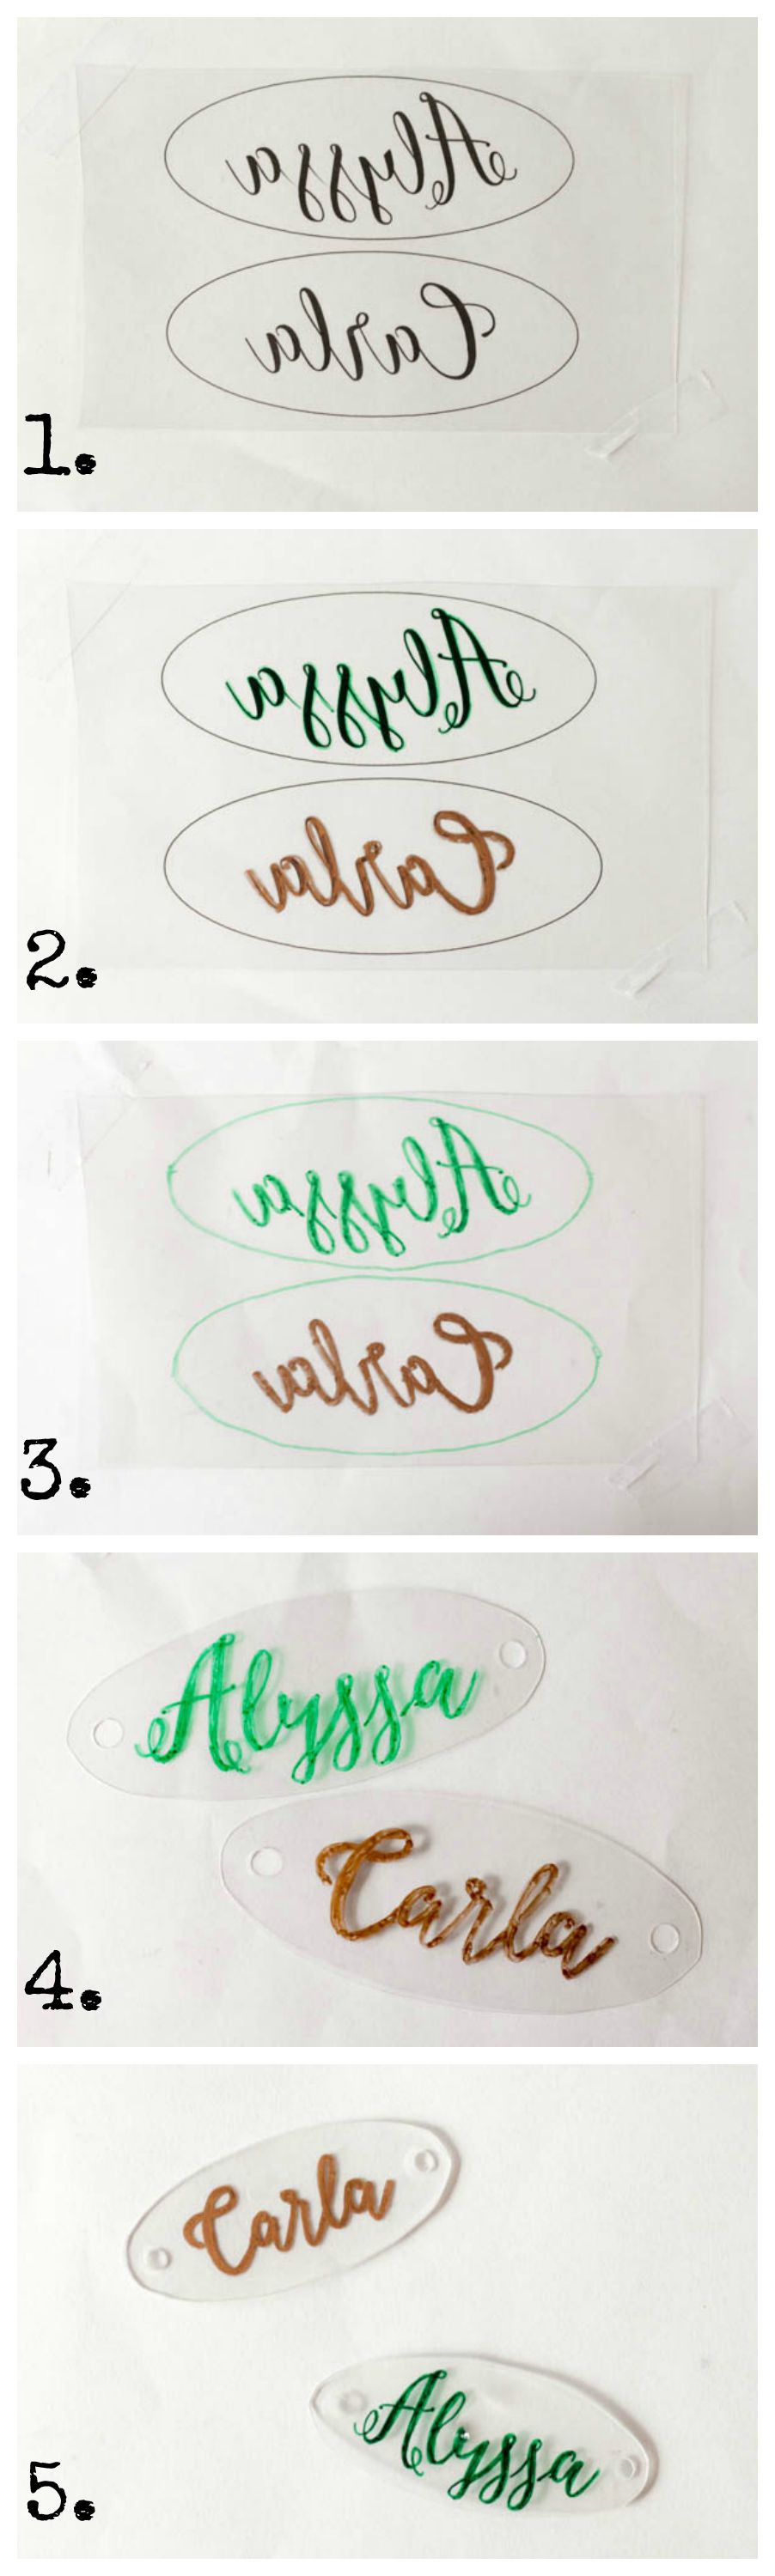
1. Tape the plastic sheet onto the reverse image of your calligraphy names.
2. Use permanent markers to trace the images and draw the outline of your tag.
3. Tape your design over a blank white piece of paper. Clean up the design and fill in any holes in the color. It doesn’t have to be perfect, because everything will become concentrated when it shrinks.
4. Cut out the tags and punch holes where you want to string the tags.
5. Bake according to your package’s instructions (I baked mine one at a time at 350 degrees F on foil-lined baking sheets for about 45 seconds, then flattened between 2 heavy books while still hot).
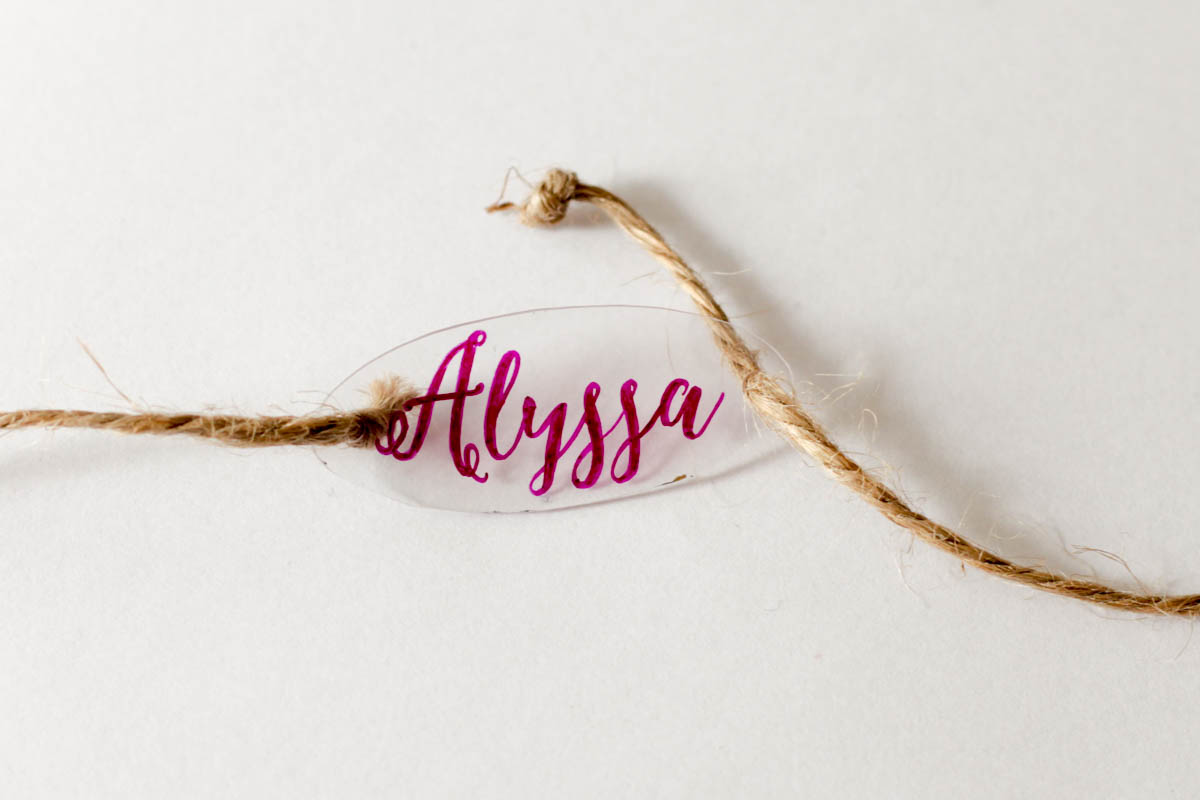
6. Once cooled, attach your chosen string/twine/yarn/etc. to finish the project!
One year ago: DIY cocktail umbrellas
Two years ago: Homemade vanilla waffle cones
1. I am so impressed with this shrinky dink stuff!!!!
2. Is THAT your HANDWRITING?! Jeals. I mean, I have to pat myself on the back over here and say that I really love my printing skills, just not my writing. Oooh.
Oh my gosh, Nancy, I wish I could write like that! I printed it on the computer then traced it, lol.
Oh man! I was obsessed with shrinky dinks as a kid! This is probably the most beautiful and creative use I’ve seen for them in my adult life – this would be the perfect wedding place setting!
Aw thanks, Sarah! I thought they’d be really great for a wedding or a shower too 🙂
SO pretty! And I need to know where those gorgeous flowered napkins are from! 🙂
Thanks, Noelle! The napkins are from Greengate.