
As renters, we have very little flexibility around wall decor. I’ve ignored the “no nails” rule a few times and put some teeny tiny little pin nails into the a few places, but I hesitate to do that too much. So the rest of our wall decorations have to be able to hang from those plastic hooks that hang from the removable sticky pads. They work, but they don’t really hold a ton of weight. And I wouldn’t trust them to hold anything that I’m in love with.
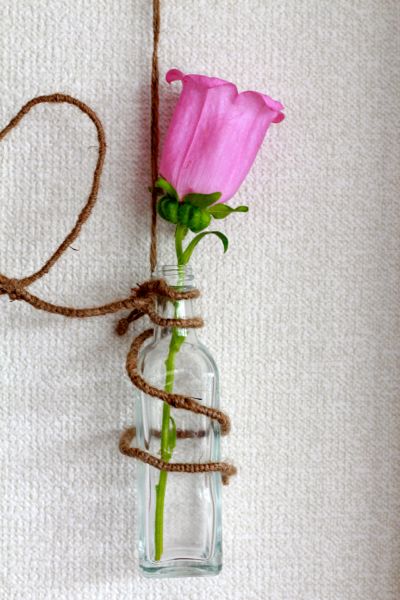
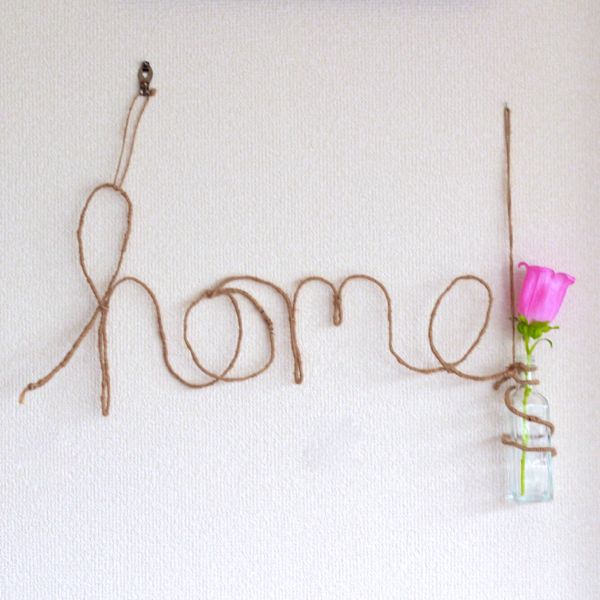
I’ve been trying to come up with a lightweight wall hanging for our entryway. I really liked the idea of spelling out “home” somehow, but wanted a way to do it without putting nails in the wall. So I wrapped flexible wire with twine and shaped it into the word. To add even more cheer to the entryway, I wrapped a small bottle with the wire to use as a bud vase. Wrapping the wire took a little bit of time, but it wasn’t difficult. I just threw a Law and Order marathon up on the tv and wrapped away!
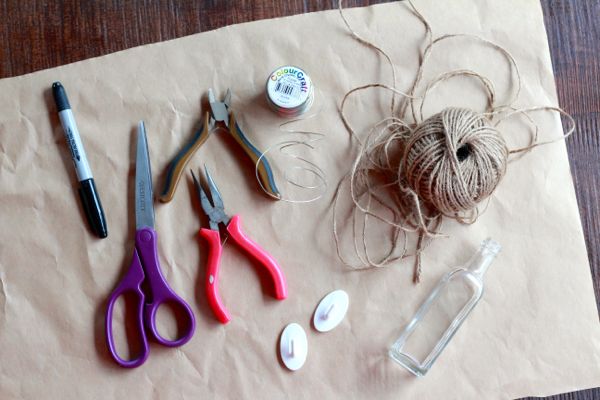
What you’ll need:
Flexible wire
Twine
Wire cutters, pliers and scissors
Paper and marker
Small bud vase or glass bottle
1-2 adhesive hooks for hanging
What to do:
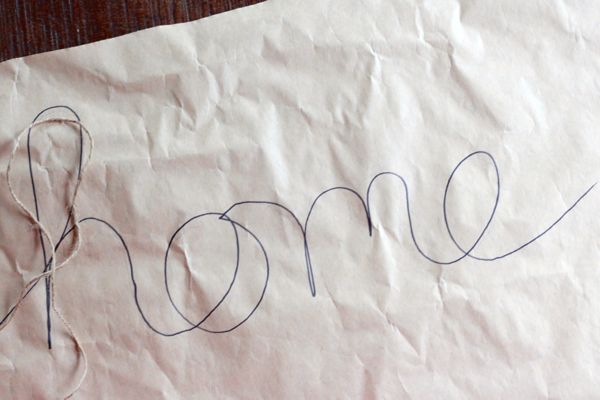
1. Use the paper and marker to draw out the word you want to spell. Roughly trace the outline in twine and cut the length to measure how long your wire needs to be. Add a few extra inches of length for a buffer, and add about 6 more inches to wrap the vase.
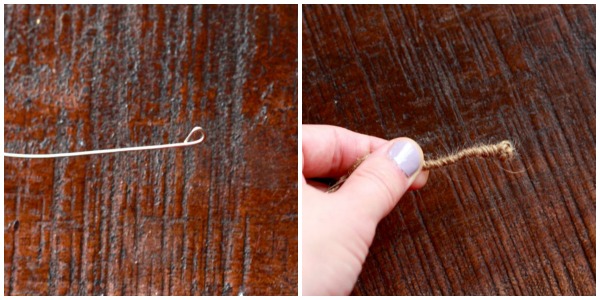
2. Cut your wire to the length of the string. Create a small loop at one end of the wire, and tie the twine to it to anchor the string. Twist the twine around the wire, pushing loops together as you twist to make sure the string covers all of the wire. As you approach the end, create a small loop on the end of the wire. Wrap the twine up to the very edge of the loop, then tie it off onto the loop to anchor the string.
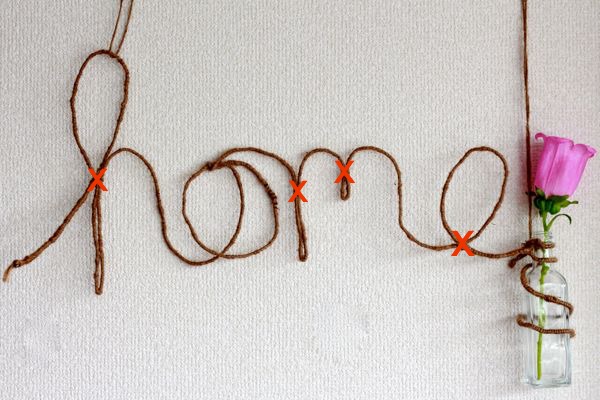
3. Shape the wire into the word, using pieces of twine to secure points on the word that need to be held in place (I’ve placed a red “x” over every point in the photo above where I tied off a piece of twine to help the word hold its shape). Wrap the wire around the vase to attach it to the word.
4. Attach the hook(s) to the wall where you want to hang the word. Use additional twine to hang the word from the hook.
p.s. if you’re wondering why I didn’t use the sticky hooks for the photos, it’s because the light in my entryway is terrible. Instead of taking the photos under the fluorescent light, I took down some photos that were on a better-lit wall and used those nails instead 😉
Last year: A jewelry tutorial! Make your own pretty drop earrings.

It looks lovely with the flower vase on the side 🙂 Sweet idea
So cute!
Thia is a really cute idea! I want to do this for a bridal shower entry way with someone’s name. Thanks for the how-to!
Jamie, what a fun idea! Send us a picture if you end up doing it 😉
This is such a cute idea and affordable too! Pinned 🙂 I’d love it if you shared this over at The Makers link party going on at my blog right now, UpcycledTreasures.com Hope to see you there!
Hi Alyssa … I fell in love with ur wall hanging “HOME”… I’ve been looking for just the word “HOME” minus the bud vase to hang on my wall but I’m really not an arts & craft type person…do you make these to purchase?… If so, I’m very much interested in having one.
Hi Tyra, I’m so sorry but I don’t make these for purchase. I would send you the one I made for the blog post but I’m fairly certain it didn’t make the move back from Tokyo. If I unearth it as I unpack, I’ll let you know. It was really easy to make, even if you aren’t a crafty person…probably only took about 30 minutes and you can do it with the TV on!